Author: shrwanswami@gmail.com

  • Where Freelancers Can Help With a Home Renovation—and Where They Can’t

    A renovation usually involves more than the people carrying tools. Someone has to organize measurements, compare quotes, make a mood board, keep track of decisions, and sometimes prepare photos or a listing description when the work is done. Some of those tasks can be handled by freelancers online, which may save time when you’re juggling work and a home project. The important part is knowing what’s suitable to delegate—and what needs a qualified local professional on site.

    Start by Splitting the Work Into Two Groups

    Before searching for help, write down the jobs involved and sort them into two lists: work that needs physical access or regulated expertise, and work that can be completed remotely. This one step can prevent an awkward mismatch between what you need and what a freelancer can deliver.

    Electrical installation, plumbing changes, structural alterations, waterproofing, and site supervision generally require an appropriately qualified professional who understands local rules and can inspect the property. A remote freelancer can’t verify what’s behind a wall or take responsibility for safe installation. By contrast, organizing references, editing documents, preparing a visual concept, or formatting a project tracker can often be done online.

    Useful Tasks to Delegate Online

    Think of freelancers as support for the planning and communication around a renovation, not as substitutes for your contractor. Depending on the project, useful tasks might include:

    • Creating a mood board: A graphics or design freelancer can arrange your reference images, colors, and material ideas into a clear visual document.
    • Digitizing a basic sketch: A freelancer may help turn your room measurements and hand-drawn layout into a cleaner presentation. Treat it as a concept, not a construction drawing, unless a qualified designer has reviewed it.
    • Organizing project information: A spreadsheet specialist can set up a simple tracker for quotes, selections, delivery dates, and outstanding questions.
    • Editing written material: A writer can help make a renovation brief, rental listing, or project update easier to understand.
    • Preparing photos or video: A freelancer can edit progress footage or finished-room images for a portfolio or family record.

    These are most helpful when your instructions are specific. “Make the living room look modern” leaves a lot open to interpretation. “Create a one-page board using these six reference images, keeping the existing sofa and showing two wall-color options” gives the freelancer something concrete to work with.

    Write a Brief Before You Post a Job

    A good brief saves time on both sides. Include the room’s dimensions, the purpose of the work, your preferred file format, any reference images, and what you do not want changed. If you’re asking for a visual concept, say whether it is for inspiration or for a professional to review. Don’t send sensitive documents or full home-access details unless there’s a real need.

    Be clear about the deliverable and the number of revisions. For example, you might request one mood board in PDF format and one round of small edits. That’s easier to assess than an open-ended request for “design help,” and it gives you a sensible point at which to decide whether the result meets your needs.

    Compare Platforms and Protect Your Budget

    Freelance marketplaces differ in their available services, pricing, and payment process, so read the current terms before placing an order. Osdire is one marketplace where buyers hire freelancers across more than 900 categories, including programming and tech, graphics and design, writing and translation, video and animation, music and audio, photography, and marketing. Its pricing is flat with no hidden fees, and payment is held securely while an order is underway, then released once the delivered work is approved. For a homeowner, that kind of arrangement can be useful for a clearly defined, non-urgent support task; it still doesn’t replace checking a freelancer’s samples and agreeing on the scope.

    If your renovation project also involves sharing updates or preparing written content, iCopify’s home page is another place to explore. As with any online service, check what is currently offered and whether it matches the specific task you have in mind before committing money.

    Keep freelance spending in proportion to the renovation budget. A polished mood board can help you explain your preferences, but it shouldn’t take money away from essential items such as safety checks, sound materials, or a contingency fund. For cost estimates, get local quotes from tradespeople who have inspected the job.

    Keep Decisions and Approvals in Your Hands

    Use online work to make decisions clearer, not to make decisions for you. Check every measurement against the actual room. Have a qualified professional review plans that affect structure, services, or building compliance. If a visual concept conflicts with site conditions, the site conditions win.

    For larger renovations, save the final versions of your brief, drawings, selections, and contractor approvals in one folder. Label files with dates and versions so no one is building from an old plan. A simple record of who approved what can head off confusion when materials are ordered or work is underway.

    Final Thoughts

    Freelancers can make the administrative and creative edges of a renovation easier: organizing information, preparing visuals, editing copy, or presenting the finished space. They’re most useful when the task is remote, the brief is precise, and the result will be checked by you or the right professional. Leave on-site judgment and regulated building work to qualified people who can inspect the property. That division keeps online help practical without asking it to do a job it can’t safely do.

  • Junk Hauling: A Smarter Way to Clear Unwanted Items

    Junk Hauling: A Smarter Way to Clear Unwanted Items

    Clutter rarely disappears on its own. Old furniture, broken appliances, construction debris, yard waste, and unwanted household items can quickly turn garages, storage areas, offices, and rental properties into difficult spaces to use. Junk Rescue AZ helps property owners take a more organized approach to junk hauling by making the removal process more efficient and manageable.

    But junk removal is about more than creating extra space. Responsible hauling can improve property safety, simplify renovations, support cleaner surroundings, and prevent usable materials from unnecessarily ending up in landfills.

    Whether you are preparing for a move, cleaning out a property, completing a renovation, or simply reclaiming valuable space, understanding how professional junk hauling works can help you make better decisions about what happens to unwanted items.

    What Is Junk Hauling?

    Junk hauling involves collecting, loading, transporting, and properly handling unwanted materials from residential or commercial properties. Depending on the provider and the type of material, services may include furniture removal, appliance disposal, construction debris removal, yard waste hauling, and general property cleanouts.

    Unlike simply placing unwanted items beside a curb, professional hauling addresses the entire removal process. Items must be gathered, lifted safely, loaded efficiently, transported, and taken to an appropriate destination.

    This can be especially useful when materials are too bulky, heavy, numerous, or difficult to transport with a personal vehicle.

    Common items handled through junk removal services may include:

    • Old couches, tables, mattresses, and cabinets
    • Broken appliances and household equipment
    • Garage and storage clutter
    • Renovation and construction debris
    • Yard waste and outdoor materials
    • Office furniture and commercial junk
    • Items left behind during property cleanouts

    Knowing what a service accepts before scheduling removal can help prevent delays and ensure the right resources are available.

    When Should You Consider Professional Junk Hauling?

    Not every cleanup requires professional assistance. A few boxes of unwanted belongings can often be handled independently. Larger projects, however, can become physically demanding and time-consuming.

    Professional junk hauling can be particularly helpful when:

    1. You Are Moving

    Moving is an opportunity to evaluate what you actually need. Instead of transporting broken furniture, outdated appliances, or unused belongings to a new property, removing them before the move can reduce the amount of material that needs to be packed and transported.

    A pre-move cleanout can also make staging and organizing the property easier.

    2. You Are Renovating

    Remodeling projects can generate substantial amounts of debris. Wood scraps, damaged fixtures, flooring materials, drywall, cabinets, and other waste can quickly occupy valuable work space.

    Prompt construction debris removal keeps the site more organized and can reduce obstacles around active work areas.

    3. You Are Clearing a Garage

    Garages often become convenient storage areas for items that are rarely used. Over time, this can make it difficult to park vehicles, access tools, or use the space for its intended purpose.

    Removing broken equipment, outdated furniture, empty containers, and other unnecessary items can transform an overcrowded garage into functional storage or workspace.

    4. You Are Preparing a Property for Sale or Rental

    A clean, uncluttered property generally presents better to prospective buyers or tenants. Removing unwanted belongings from garages, yards, storage rooms, and interiors can make the available space easier to see and evaluate.

    Property cleanouts can also help owners prepare for inspections, renovations, or new occupants.

    The Benefits of Professional Junk Removal

    One of the biggest advantages of hiring a hauling service is convenience. Instead of arranging transportation and finding a way to handle heavy materials yourself, you can have the removal process managed as a single project.

    There are several other practical benefits.

    Time savings: Large cleanouts can take multiple trips when handled with a personal vehicle. Professional hauling can consolidate the work into a more efficient process.

    Reduced physical strain: Moving appliances, furniture, and heavy debris can create unnecessary lifting risks. Experienced crews use appropriate equipment and techniques to handle bulky materials.

    Better organization: Removing unwanted items in a planned manner can make it easier to separate recyclables, reusable belongings, debris, and disposal materials.

    Improved property usability: Clearing clutter can restore garages, patios, storage areas, offices, and other spaces to practical use.

    Simpler cleanup projects: Whether the job involves one large item or a full property cleanout, professional removal can reduce the number of logistical tasks homeowners and businesses need to manage themselves.

    Responsible Junk Disposal Starts With Sorting

    Not everything should automatically be treated as ordinary trash. Before hauling begins, materials should be considered based on their condition, composition, and potential destination.

    A useful starting point is to separate unwanted items into categories:

    1. Reusable items – Furniture, equipment, or household goods that may still have practical value.
    2. Recyclable materials – Certain metals, cardboard, electronics, and other materials may have recycling options.
    3. General waste – Items with limited reuse or recycling potential may require standard disposal.
    4. Special materials – Certain hazardous or regulated items may require specialized handling rather than conventional junk removal.

    This approach can reduce unnecessary disposal and encourage better resource management.

    Homeowners should also check local rules before attempting to dispose of chemicals, paints, batteries, tires, electronics, or other restricted materials. A reputable hauling provider can explain which materials it accepts and whether special arrangements are necessary.

    How to Prepare for a Junk Hauling Appointment

    A little preparation can make removal faster and easier.

    Start by identifying everything you want removed. Walk through garages, storage rooms, attics, offices, outdoor areas, and other spaces where unwanted materials may have accumulated.

    Next, make sure the items are accessible. Clearing a path to bulky furniture or appliances can help the crew work efficiently. If certain belongings are staying, clearly separate them from items designated for removal.

    It is also useful to provide accurate information when requesting an estimate. Describe the type and approximate quantity of materials, mention unusually large or heavy items, and identify where the junk is located.

    Accurate details help the hauling provider determine the appropriate equipment, labor, and vehicle requirements.

    How to Choose a Junk Hauling Company

    With multiple removal providers available, price should not be the only consideration. A reliable company should offer clear communication, transparent service details, and responsible handling practices.

    Consider these factors before scheduling:

    • Service scope: Confirm that the company handles the type of junk you need removed.
    • Pricing transparency: Ask how estimates are determined and whether additional charges may apply.
    • Professionalism: Look for clear communication and organized scheduling.
    • Disposal practices: Ask whether reusable or recyclable materials are diverted when appropriate.
    • Experience: Consider whether the provider regularly handles projects similar to yours.
    • Convenience: Determine whether loading and transportation are included in the service.

    Reading reviews can also provide insight into punctuality, communication, customer service, and overall reliability.

    Junk Hauling Can Support Better Property Management

    Junk removal should not necessarily be viewed as a once-in-a-lifetime cleanup. Regular decluttering can prevent unwanted materials from accumulating to the point where removal becomes overwhelming.

    For homeowners, seasonal cleanouts can help maintain usable storage areas. Businesses can schedule periodic office or warehouse cleanups to prevent obsolete furniture, equipment, and materials from taking up valuable space.

    Property managers may also benefit from timely removal after tenant turnover, renovations, evictions, or maintenance projects.

    The key is to address accumulation before it becomes a larger logistical problem.

    Make Every Cleanup More Efficient

    The most effective junk removal projects begin with a clear plan. Decide what needs to go, separate items that should remain, identify materials requiring special handling, and choose a removal provider capable of completing the job safely and efficiently.

    Professional junk hauling can turn a difficult cleanup into a straightforward process while helping property owners reclaim usable space. It can also provide a practical solution when the volume, weight, or type of unwanted material makes DIY removal inconvenient.

    Whether you are clearing a garage, preparing for a move, managing renovation debris, or completing a property cleanout, Junk Rescue AZ can help simplify the process and get unwanted materials out of your way.

    A cleaner property starts with deciding what no longer belongs there. The sooner unnecessary clutter is addressed, the sooner the space can become safer, more functional, and easier to enjoy.

  • Minimalist Interior Design Ideas for Modern Homes

    Minimalist Interior Design Ideas for Modern Homes

    Ever walked into a friend’s house and felt instantly calmer, even though you couldn’t quite say why? Chances are, that home was built around minimalist interior design. Less furniture. More breathing room. Nothing screaming for your attention.

    In 2026, with apartments in cities like Bengaluru and Mumbai shrinking every year while rents climb, minimalist interior design isn’t just a style choice anymore — it’s become the practical answer for people who want their homes to feel bigger, calmer, and easier to live in. This guide walks you through real, doable ideas, not just Pinterest fantasies.

    What Is Minimalist Interior Design, Really?

    Minimalist interior design means keeping only what serves a purpose or brings genuine joy — everything else goes. It favors clean lines, neutral palettes, and open space over ornamentation, prioritizing function and calm over visual noise.

    The term gets thrown around loosely these days. Some people think it just means “white walls and no clutter.” That’s part of it, sure. But real minimalism is more about intention. Every object in the room earns its place. If it doesn’t, out it goes.

    I’ve noticed a lot of homeowners confuse minimalism with feeling cold or empty. Done right, it’s the opposite — a minimalist room can feel warmer than a cluttered one, simply because your eyes have somewhere to rest.

    Start With a Neutral Colour Palette

    Minimalist interior design almost always begins with the walls. Whites, warm greys, soft beiges, muted sage — these colours create a calm base that lets furniture and light do the talking.

    You don’t need to go stark white if that feels sterile to you. A warm off-white or a pale terracotta (popular in a lot of Jaipur homes, actually) still reads as minimal while adding a bit of soul. The trick is consistency — pick two or three tones max and repeat them across the space.

    A few combinations that work well:

    • White walls with a walnut wood floor and black accents
    • Warm beige walls paired with rattan furniture and brass fixtures
    • Soft grey walls with sage green textiles and light oak

    [link to related guide on choosing the right paint colours for small homes here]

    Declutter Before You Decorate

    Direct answer: Decluttering before decorating is the single most effective step in achieving minimalist interior design — it reveals which pieces actually deserve space, and it’s free. Start room by room, not all at once, and donate or sell anything unused in the last year.

    I know, everyone says this. But most people skip it and jump straight to buying new furniture, which honestly defeats the purpose. Picture a small business owner in Jaipur who wanted a minimalist home office. She spent nearly ₹40,000 on new shelving before realizing the real issue was three years of old files and unused stationery taking up half the room. A weekend of decluttering did more than the shelves ever could.

    Try the one-year rule: if you haven’t touched it in twelve months, it probably doesn’t need to live in your main living space anymore.

    Choose Multi-Functional Furniture

    Small homes benefit enormously from furniture that pulls double duty. A storage ottoman. A bed with drawers underneath. A dining table that folds down when it’s not in use.

    This matters more in Indian homes than a lot of design blogs admit — many of us are working with 600 to 900 square feet, not sprawling Western-style layouts. Minimalist interior design in this context isn’t about buying less furniture for the sake of it; it’s about buying furniture that does more with less.

    A few favorites worth considering:

    • Nesting coffee tables that tuck away when guests leave
    • Wall-mounted study desks that fold flat
    • Modular sofas you can rearrange as your space changes

    Let Natural Light Lead the Design

    Direct answer: Natural light is central to minimalist interior design because it reduces the need for heavy window treatments and artificial fixtures, making rooms feel more open. Use sheer curtains instead of heavy drapes, and keep furniture away from windows wherever possible.

    Honestly, this is the one thing I wish more people prioritized before spending on decor. A room flooded with daylight looks minimal even with a few extra pieces in it, while a dim, curtain-heavy room feels cluttered no matter how sparse the furniture is.

    If you’re renovating, consider larger windows or glass partitions between rooms. If you’re renting and can’t make structural changes, light-coloured, sheer curtains and strategically placed mirrors go a long way.

    Keep Storage Hidden, Not Displayed

    Open shelving looks great in magazine photos and terrible in daily life — dust collects, clutter creeps back in, and suddenly you’re “styling” your bookshelf every week just to keep it presentable. Has that ever happened to you?

    Closed cabinetry, built-in wardrobes, and under-bed storage keep the visual field clean while still giving you somewhere to put actual stuff. This is one area where I’ll happily disagree with some minimalist purists who insist on having almost nothing behind closed doors either — realistically, most families need storage, and hiding it is smarter than pretending it doesn’t exist.

    Limit Your Decor to a Few Meaningful Pieces

    Rather than filling every wall and shelf, minimalist interior design asks you to choose two or three pieces that actually mean something — a piece of art, a plant, a family heirloom — and give them room to stand out.

    A single large piece of art on an otherwise bare wall has more impact than five small frames crowded together. The same goes for plants: one healthy fiddle-leaf fig in a corner does more for a room than a dozen scattered succulents.

    [link to related article on budget-friendly home decor ideas here]

    Use Textures to Add Warmth

    A common mistake is thinking minimalism means avoiding texture. It doesn’t. Linen cushions, a jute rug, a wooden coffee table, matte ceramic vases — these add depth without adding clutter.

    Without texture, a minimalist room risks feeling flat or showroom-like. Mixing two or three natural textures per room keeps things visually interesting while staying true to the overall calm, uncluttered feel.

    Budget-Friendly Minimalist Tips for Indian Homes

    You don’t need a big renovation budget to pull this off. Here’s what actually moves the needle:

    • Repaint one accent wall instead of the whole house (₹3,000–₹6,000 typically)
    • Swap heavy curtains for lighter, sheer ones
    • Sell or donate unused furniture before buying anything new
    • Invest in one good-quality sofa rather than three mediocre pieces
    • Use vertical storage to free up floor space in small rooms

    FAQs About Minimalist Interior Design

    Is minimalist interior design expensive? Not necessarily. A lot of the cost actually comes down before it goes up — decluttering, repainting, and rearranging existing furniture cost little to nothing. Where it gets pricier is if you’re replacing everything with designer pieces, which isn’t required.

    Does minimalist design work for small apartments? Yes, arguably better than almost any other style. Fewer pieces and open sightlines make small spaces feel noticeably larger.

    Can I mix minimalism with Indian traditional decor? Definitely. Many homeowners blend a few heirloom pieces or traditional textiles into an otherwise minimal space — it adds warmth and personality without overwhelming the room.

    How many colours should I use in a minimalist home? Two to three is the general rule — one base neutral, one secondary tone, and an occasional accent colour.

    Is minimalist design good for families with kids? It can be, honestly better than clutter-heavy homes, since there’s less to trip over and less to clean. The key is building in enough hidden storage for toys and everyday mess.

    Do I need to hire a designer for a minimalist home? No, though it helps for larger renovations. Many of the ideas here — decluttering, choosing a neutral palette, adding texture — you can do yourself over a weekend or two.

    Final Thoughts

    Minimalist interior design isn’t about owning less for the sake of a trend — it’s about making room, literally and mentally, for the things that matter. Start small: declutter one room, repaint one wall, swap out heavy curtains for sheer ones. You don’t need to overhaul your whole home in a weekend.

    Pick one idea from this list and try it this week. See how the room feels afterward — that feeling is usually what convinces people to keep going.

    Suggested image alt text:

    1. “Minimalist living room with neutral walls and natural light”
    2. “Small apartment minimalist interior design with multi-functional furniture”
    3. “Minimalist bedroom with hidden storage and warm textures”
  • Home Design Ideas: How to Mix Colors and Textures

    Home Design Ideas: How to Mix Colors and Textures


    Home Design Ideas: How to Mix Colors and Textures

    Ever put together a room that had all the “right” pieces — nice sofa, decent rug, a few plants — and it still felt flat? That’s usually not a furniture problem. It’s a colour and texture problem.

    Good home design ideas almost always come down to contrast: something smooth next to something rough, something warm next to something cool. In 2026, with so many Indian homeowners mixing modern furniture with traditional textiles, getting this balance right matters more than ever. This guide breaks down how to actually do it, not just why it works.

    Why Colour and Texture Make or Break a Room

    Direct answer: Colour and texture matter because they’re what your eye notices before it registers a single piece of furniture. A room can have expensive furniture and still feel “off” if the colours clash or every surface has the same flat finish.

    I’ve walked into plenty of beautifully furnished homes that somehow felt cold. Nine times out of ten, it’s because everything was the same texture — glossy tiles, glossy furniture, glossy curtains. Nothing for the eye to rest on, nothing that invites you to touch it.

    Good home design ideas treat colour and texture as a pair, not two separate decisions. They work together, or they fight each other. There’s rarely an in-between.

    Start With a Base Colour, Then Build Around It

    Pick one dominant colour for your walls or largest furniture piece — this becomes your anchor. Everything else, your accent colours, your fabrics, your accessories, gets chosen in relation to that base, not randomly.

    A lot of people skip this step and just buy things they like individually. Then they wonder why the living room looks like five different Pinterest boards collided. Has this happened in your home?

    For an Indian context, a warm terracotta or deep indigo wall works beautifully as a base, especially paired with brass and wood accents. If you want something safer, a warm grey or sage green gives you more room to experiment later without repainting.

    The 60-30-10 Rule for Mixing Colours

    This is one of the oldest tricks in home design ideas, and it still works because it’s genuinely simple: 60% of the room in your dominant colour, 30% in a secondary colour, and 10% in an accent.

    Picture a small business owner in Jaipur redoing her home office. She painted the walls a soft off-white (60%), added a navy accent chair and curtains (30%), and threw in a mustard cushion and a couple of brass frames for the final 10%. The room went from “generic” to “intentional” without her buying a single new piece of furniture — just paint and textiles.

    A rough breakdown:

    • 60% — walls, large furniture, flooring
    • 30% — curtains, an accent chair, a large rug
    • 10% — cushions, vases, small decor pieces

    Layer Textures Before You Worry About Colour Perfection

    Direct answer: Layering textures means combining rough, smooth, matte, and glossy surfaces in the same room — a jute rug under a leather sofa, or linen cushions against a polished wood table. This adds depth even when the colour palette stays simple.

    Honestly, texture does more heavy lifting than people give it credit for. You could keep an entire room in shades of white and still make it feel rich, purely through texture — think a chunky knit throw, a rattan chair, a smooth ceramic vase, and a rough-hewn wooden shelf all in the same space.

    A mistake I see a lot: rooms where every fabric is cotton, every surface is matte, nothing has any shine or texture variation. It’s not wrong exactly, just a bit boring. Mix in something reflective — a brass lamp, a mirrored tray — and the room instantly feels less flat.

    Use Warm and Cool Tones to Create Balance

    Pure warm palettes (all reds, oranges, browns) can start to feel heavy in smaller rooms. Pure cool palettes (all blues, greys, greens) can feel a little sterile if overdone. The trick most good home design ideas rely on is mixing a touch of the opposite temperature in.

    A cool grey sofa gets warmed up with a mustard or rust cushion. A warm terracotta wall gets balanced with cool slate-grey ceramics. Even a 10% dose of the opposite tone keeps a room from feeling one-note.

    [link to related guide on choosing paint colours for small homes here]

    Don’t Ignore Natural Materials

    Wood, cane, jute, stone, brass — these materials bring texture and warmth that fabric alone can’t. They also tend to age well, unlike trendy fabric patterns that can look dated in a couple of years.

    Rattan furniture has made a big comeback across Indian homes recently, and honestly, I get why — it pairs with almost any colour scheme and adds instant texture without shouting for attention. A cane headboard, a jute door mat, a stone coaster set — small additions, big difference.

    Mixing Patterns Without It Looking Chaotic

    This is where a lot of home design ideas go wrong in practice. People either avoid patterns entirely (safe, but boring) or throw in five different prints and hope for the best.

    A more reliable approach:

    1. Pick one “hero” pattern — a bold cushion, a patterned rug, whatever draws the eye first
    2. Add one smaller-scale pattern in a related colour (stripes work well here)
    3. Keep everything else solid or textured, not patterned

    Three patterns max in any single room is a decent rule of thumb, and even that can feel like a lot in a smaller space.

    Budget-Friendly Ways to Test Combinations Before Committing

    You don’t need to repaint or reupholster to test a colour and texture combo. Buy fabric swatches, or pick up a few cushion covers for ₹300–₹600 each and live with them for a week before deciding.

    • Try paint sample pots on a small wall section rather than committing to a full gallon
    • Rearrange existing cushions and throws before buying new ones
    • Photograph the room in different light — morning and evening light change how colours read

    FAQs About Mixing Colours and Textures at Home

    How many colours should I use in one room? Three is a safe number — one dominant, one secondary, one accent. Going beyond four or five tends to make a room feel busy rather than curated.

    Can I mix warm and cool colours in the same room? Yes, and honestly you should. A small amount of the opposite temperature keeps a room from feeling flat or one-note.

    Is it okay to mix patterns and textures together? Definitely, just keep it controlled. One bold pattern, one smaller supporting pattern, and the rest kept solid or textured usually works best.

    What’s the easiest way to add texture on a budget? Cushions, throws, and a jute or cane accent piece go a long way without needing a full furniture change. Even swapping curtain fabric makes a noticeable difference.

    Do dark colours make small rooms feel smaller? Not always — a dark accent wall paired with good lighting and lighter furniture can actually add depth rather than shrinking the space.

    How do I know if my colour palette is too matchy? If everything in the room is nearly the same shade with no contrast in texture or tone, it can start to feel flat rather than cohesive. A little contrast usually fixes it.

    Final Thoughts

    Mixing colours and textures well isn’t about following one rigid formula — it’s about building contrast on purpose instead of by accident. Start with a base colour, layer in textures, and don’t be afraid to test combinations with something as cheap as a cushion cover before committing to bigger changes.

    Pick one room in your home and try the 60-30-10 approach this weekend. Small changes — a new throw, a different curtain fabric — often make a bigger difference than people expect.


    Suggested image alt text:

    1. “Living room with mixed textures showing jute rug and leather sofa”
    2. “Home design ideas for warm and cool colour balance in bedroom”
    3. “Terracotta accent wall with brass and wood decor accessories”
  • How to Decorate a Small Apartment Without It Looking Cramped

    How to Decorate a Small Apartment Without It Looking Cramped

    Ever walked into a tiny flat and thought, wow, this actually feels bigger than mine? That’s not luck. Learning how to decorate small apartment spaces well is mostly about a handful of smart choices, not square footage. I lived in a 450 sq ft apartment in Pune for two years, and by the end of it, guests genuinely assumed it was bigger than my current place. It wasn’t. I just stopped fighting the size and started working with it.

    This guide covers what actually works in 2026 — real tricks, not vague “declutter your space” advice you’ve read a hundred times already.

    Pick Furniture That Does Two Jobs

    Quick answer: In a small apartment, furniture should multitask. A storage ottoman, a sofa bed, a coffee table with drawers — each piece should solve more than one problem so you’re not cramming in extra furniture just to make up for what your main pieces lack.

    I used to think multi-purpose furniture was a gimmick, honestly. Then I bought a bed frame with drawers built into the base and realized I’d freed up an entire wardrobe’s worth of space. That changed my mind pretty fast.

    A few worth considering:

    • Nesting tables that tuck away when not in use
    • A fold-down wall desk for work-from-home setups
    • Ottomans that open up for blanket or shoe storage

    Go Vertical, Not Horizontal

    Floor space is limited, but walls usually aren’t. This is probably the single biggest shift in mindset when you decorate small apartment interiors — stop thinking about what fits on the floor and start thinking about what fits on the wall.

    Tall, narrow bookshelves do more for a room than short, wide ones. Wall-mounted shelves above the sofa or bed free up real floor space for walking. Even hooks near the entryway keep shoes and bags from turning into a floor pile — which, let’s be honest, happens in every small apartment eventually.

    Use Light Colors, But Don’t Go Overboard

    White walls do open up a room, that part’s true. But an entire apartment in stark white can feel a bit like a hospital waiting room if you’re not careful.

    I’d suggest soft off-whites or light greys as the base, then bring in color through cushions, a rug, or one accent wall. It keeps things feeling airy without feeling sterile.

    Mirrors Are Your Best Friend

    Quick answer: Placing a large mirror across from a window or a light source instantly makes a small apartment feel more open, since it bounces light around and creates the illusion of depth. It’s one of the cheapest, most effective tricks available.

    A floor-length mirror leaning against a wall works nicely in a bedroom corner. In a living room, hang one behind or beside the sofa — just make sure it’s not directly reflecting clutter, or you’ve doubled the mess instead of the space.

    Keep a Consistent Flooring or Rug Tone

    Switching flooring materials or clashing rug colors between rooms chops up the visual flow, and in a small apartment, that reads as smaller, not bigger. Try to keep flooring tones consistent, or at least in the same color family, room to room.

    If you’re renting and can’t change the actual flooring (most of us can’t), a single large area rug that flows under your main furniture pieces does a similar job.

    Curtains Higher and Wider Than the Window

    This one surprises people. Hanging curtain rods a few inches above the actual window frame, and extending them slightly wider on each side, tricks the eye into reading the window as bigger than it is. Ceilings look taller too.

    It costs nothing extra — same curtains, just a different rod placement. Small change, real impact.

    Declutter With a System, Not a Mood

    Picture a young professional in Bengaluru living in a 1BHK, working from the living room, eating in the same space, hosting friends there too. That room has to flex constantly. The fix isn’t “declutter more” — it’s having a system. A basket by the door for mail. A tray for remote controls. One drawer, not five random ones, for chargers and odds and ends.

    Add Personality Without Adding Bulk

    • Wall art or framed prints instead of bulky sculptures
    • Plants in hanging planters rather than floor pots, if space is really tight
    • A textured throw blanket over a plain sofa

    [link to related guide about budget decor ideas here]

    Suggested alt text: “small apartment living room with vertical shelving and light-colored walls”

    FAQs

    What’s the best way to decorate a small apartment cheaply? Start with what you already own — rearrange furniture, add a mirror, switch curtain placement. These cost little to nothing and make a real visible difference.

    Do dark colors make a small apartment look smaller? Not always, but they can if overused. A single dark accent wall is fine; dark walls throughout a tight space usually make it feel closed in.

    How can I make a studio apartment feel like it has separate rooms? A bookshelf or a folding screen works well as a soft divider. Even a rug placed under just the “living area” furniture visually separates it from the “bedroom” zone.

    Is it worth buying multi-functional furniture for a small apartment? Generally, yes. It costs a bit more upfront, but it saves you from buying extra pieces later, and it keeps the space from feeling stuffed.

    What size rug works best in a small living room? Big enough that the front legs of your main seating sit on it. A too-small rug floating in the middle of the room actually makes the space look smaller, not bigger.

    How do I add storage in a small apartment without built-in cabinets? Under-bed storage bins, wall-mounted shelves, and furniture with hidden compartments — ottomans, benches, coffee tables — cover most of what built-in cabinets would. [link to related guide about clever apartment storage here]

    Final Thoughts

    You don’t need extra square footage to make a small apartment feel good to live in — you need the right choices. Multi-purpose furniture, vertical storage, a well-placed mirror, and a bit of color restraint go a long way.

    Suggested alt text: “compact studio apartment styled with mirrors and multi-purpose furniture”

    Try one change this week — maybe just raising your curtain rods — and see if the room feels different. It usually does.

  • Living Room Decorating Ideas on a Budget That Actually Work

    Living Room Decorating Ideas on a Budget That Actually Work

    Staring at a dull living room and wondering how to fix it without draining your savings? You’re not alone. Good living room decorating ideas don’t have to mean expensive furniture or a full renovation. Sometimes it’s just a fresh coat of paint, a rearranged sofa, and a bit of patience. I’ve redone my own living room three times over the years — twice on almost no budget — and the cheap versions often turned out better than the expensive one. Funny how that works.

    This guide walks through practical, low-cost ways to make your living room feel new again in 2026, without the guesswork.

    Start With What You Already Have

    Before buying anything, take a hard look at your current furniture. Can that armchair be moved to a different corner? Would the coffee table look better against the wall instead of the center?

    Living room decorating ideas don’t always require new purchases — rearranging is free, and it genuinely changes how a room feels. I once swapped my sofa and bookshelf positions and the whole room suddenly felt twice as big. No money spent, just twenty minutes of moving furniture around and a slightly sore back.

    Quick answer: Rearranging existing furniture is the cheapest way to refresh a living room. Try angling the sofa away from the wall, floating furniture in the center of larger rooms, and grouping pieces to create conversation zones instead of lining everything against the walls.

    Paint One Wall, Not the Whole Room

    A full repaint costs money and time. An accent wall costs a fraction of both. Pick a wall that gets natural light or sits behind your TV unit, and go two or three shades deeper than the rest of your walls.

    Deep teal, warm terracotta, and muted olive have been popular choices through 2025 and into 2026, and they photograph beautifully too if you’re posting your home on Instagram. A gallon of good quality emulsion paint in India typically runs somewhere between ₹800 and ₹1,500, which is honestly nothing compared to what a full makeover would cost.

    Rework Your Lighting

    Overhead tube lights are the enemy of cozy. I’ll say it plainly: nothing kills a nicely arranged living room faster than one harsh white light beaming down from the ceiling.

    • Add a floor lamp near the reading corner
    • Use warm-toned bulbs (2700K-3000K) instead of cool white
    • String fairy lights along a shelf or behind the TV unit for a soft glow in the evenings

    None of this needs an electrician. Most of it plugs straight into an existing socket.

    Slipcovers and Cushions Change Everything

    If your sofa looks tired but still has good bones, don’t replace it — cover it. Slipcovers are widely available online now, and a decent one costs a fraction of a new sofa.

    Cushions matter more than people give them credit for. Mixing textures — a linen one next to a velvet one, maybe a jute-textured cushion thrown in — adds depth without costing much. Three or four good cushion covers can run under ₹1,200 total and instantly change the sofa’s whole personality.

    Bring In Greenery

    Plants are probably the most underrated of all living room decorating ideas. A snake plant or money plant costs very little, needs almost no attention, and adds life to a corner that otherwise just sits empty.

    Picture a small apartment in Jaipur with a bare corner next to the window. Add one tall plant in a terracotta pot, and suddenly that dead space has a purpose. It’s such a small change, but it works every time.

    Use Mirrors to Fake More Space

    Quick answer: A large mirror placed opposite a window reflects natural light back into the room and visually doubles the sense of space. It’s one of the fastest, cheapest tricks for making a small living room feel considerably larger.

    Thrift stores and local furniture markets often have old mirror frames going cheap. A bit of sanding and spray paint, and it looks brand new.

    Rugs Anchor the Whole Room

    An empty floor makes a room feel unfinished, even if the furniture is nice. A rug — even a modest one — pulls everything together visually.

    Rule of thumb: the rug should be big enough that at least the front legs of your sofa and chairs sit on it. A rug that’s too small just floats in the middle looking a bit lost, which I learned the hard way with my first apartment.

    Curate Your Shelves, Don’t Overfill Them

    Open shelving is one of the more affordable living room decorating ideas, but I’ve noticed people tend to cram every shelf full immediately. Resist that urge.

    Leave breathing room. Mix books with a small plant, a candle, maybe one framed photo. Odd numbers — three items instead of four — tend to look more intentional. [link to related guide about shelf styling here]

    DIY Wall Art on a Budget

    You don’t need original paintings. Framed fabric swatches, a set of botanical prints you find online, or even your own kid’s artwork in a nice frame can fill a blank wall for next to nothing.

    Suggested alt text: “budget-friendly gallery wall with framed prints above a living room sofa”

    FAQs

    What’s the cheapest way to decorate a living room? Honestly? Rearranging what you already own. It costs nothing and it’s the single biggest visual change you can make in an afternoon.

    How much should I budget for a living room makeover in India? Anywhere from ₹5,000 for small touches like cushions, paint, and a plant, up to ₹25,000 if you’re adding a rug, lighting, and some new decor pieces.

    Do I need to hire an interior designer for small changes? Not really, not for the ideas covered here. A designer helps with bigger structural changes, but paint, rugs, and rearranging are all things you can handle yourself.

    What colors make a small living room look bigger? Soft whites, light greys, and pale sage tend to open a room up. Save the darker, richer tones for a single accent wall instead of the whole space.

    Where can I buy affordable home decor online in India? [link to related guide about budget home decor shopping here] covers this in detail, but marketplaces and local artisan sellers are usually cheaper than big-box furniture stores.

    How often should I refresh my living room decor? There’s no fixed rule. Some people switch cushions and small decor every season; others repaint every two to three years. Do it whenever the room starts to feel stale to you.

    Final Thoughts

    A good living room doesn’t need a big budget — it needs a bit of thought. Start small: rearrange the furniture, add a plant, fix the lighting. See how the room feels before spending on anything bigger.

    Suggested alt text: “cozy budget-decorated living room with warm lighting and plants”

    Pick one idea from this list and try it this weekend. You might be surprised how far a ₹500 cushion cover and a moved sofa can go.

  • Exterior House Painting Tips That Actually Make the Paint Last

    Exterior House Painting Tips That Actually Make the Paint Last

    Repainted your house last monsoon and already seeing patches peel? You’re not alone. I get asked about this constantly, and almost every time the answer isn’t the paint brand — it’s the prep work nobody wanted to spend time on. Good exterior house painting tips aren’t really about picking a fancy color. They’re about the boring stuff that happens before the color even goes on the wall.

    I’ve watched a neighbor repaint his bungalow three times in five years because he kept skipping surface prep to save a weekend. Meanwhile my own house, painted properly once in 2021, still looks fresh heading into 2026. Same city, same weather, wildly different outcomes. Let’s talk about why.

    Why Exterior Paint Fails Faster Than People Expect

    Direct answer: Exterior paint usually fails early because of poor surface preparation, not poor paint quality — moisture trapped under old coats, unwashed dust and algae, and painting during high humidity are the top three culprits behind peeling and fading within a year or two.

    Most people assume a premium can of paint guarantees a decade of protection. It doesn’t. Paint is only as good as the surface underneath it. If there’s loose old paint, dust, or a hairline crack holding moisture, your new coat is basically painting over a problem instead of fixing one.

    Prep the Surface Properly Before You Even Open the Can

    This is the step everyone rushes, and it’s the one that matters most.

    Here’s roughly what proper prep should look like:

    • Pressure wash or scrub the walls to remove dust, algae, and chalking (chalking is that powdery residue you see when you rub your hand on an old wall)
    • Scrape off any loose or flaking paint completely — don’t just paint over it
    • Fill cracks with exterior-grade putty or filler, and let it dry fully, usually 24-48 hours depending on humidity
    • Sand rough patches so the new coat sits evenly
    • Apply a coat of primer, especially on bare plaster or repaired patches

    Skip any of these and you’re basically betting the paint job will look fine for a season, then start showing problems by the next one.

    Choose the Right Paint Type for Your Climate

    Direct answer: In India, homes in coastal or high-humidity regions need waterproof, algae-resistant exterior paint, while homes in hot, dry regions benefit more from heat-reflective paints that reduce surface temperature and prevent early fading.

    Not every exterior paint performs the same way everywhere. A paint that’s perfect for a dry Jaipur summer might struggle against Mumbai’s monsoon humidity and salty coastal air.

    A few categories worth knowing:

    • Waterproof/damp-proof exterior paints — good for monsoon-heavy regions
    • Heat-reflective paints — reduce indoor heat buildup, popular in Rajasthan and other hot states
    • Elastomeric paints — flexible, good for homes with minor structural cracking
    • Anti-algae/anti-fungal formulas — worth the extra cost near coastal cities or shaded, damp walls

    Honestly, I think a lot of people overspend on premium finish and underspend on the right functional type. A mid-range paint with the correct waterproofing beats a luxury paint with none, every single time.

    Timing Matters More Than People Realize

    Painting in the middle of monsoon season, or during peak summer heat, is asking for trouble. Humidity stops paint from curing properly, and extreme heat can cause it to dry too fast on the surface while staying wet underneath.

    The ideal window in most of India is post-monsoon through early winter — roughly October through February, depending on your city. Temperatures are moderate, humidity drops, and the paint gets a proper, even cure.

    Picture a homeowner in Jaipur painting their exterior in early June, right before the peak heat hits 45°C. The paint dries too fast on the surface, traps moisture underneath, and within eight months you’ve got bubbling and cracking. Same paint, same brand — painted in November instead, and it likely holds for 6-7 years.

    Don’t Skimp on the Number of Coats

    Exterior house painting tips almost always include this one, and for good reason — one coat is never enough. Most professional jobs use a primer coat plus two topcoats minimum, sometimes three on older or repaired surfaces.

    A single thin coat might look fine on day one. But it won’t hold up against UV exposure, rain, and dust the way a properly layered job will. I’ve noticed this is the corner painters cut most often when a homeowner is trying to save on labor costs — fewer coats means faster work, which means more money in the painter’s pocket per hour, not necessarily a better result for you.

    [link to related guide about hiring a reliable house painter here]

    Pick Colors That Actually Handle Sun Exposure Well

    Darker colors absorb more heat and tend to fade faster under direct sun, especially on west-facing walls that catch harsh afternoon light. Lighter, muted tones generally hold their color longer and keep the wall cooler too.

    This doesn’t mean avoid dark colors entirely — just know the trade-off going in. If you want a bold navy or charcoal exterior, expect to repaint that particular wall a bit sooner than the lighter ones.

    [link to related guide about exterior color combinations for Indian homes here]

    Maintenance Between Paint Jobs

    Direct answer: A quick annual rinse with water (and a soft scrub if algae appears) between full repaints can add real years to your exterior paint’s life by preventing dust and organic buildup from breaking down the coating early.

    You don’t need to wait until the paint looks bad to do something. A simple hose-down once a year, especially before monsoon, clears off dust and prevents algae from taking hold in shaded corners.

    Small crack? Fix it immediately rather than letting water seep in and spread the damage. It’s a lot cheaper to fill one crack now than repaint an entire wall in two years.

    Budget Realistically — Cheap Paint Costs More Long-Term

    A gallon of budget exterior emulsion might save you ₹300-500 upfront compared to a premium waterproof formula. But if it means repainting in 2 years instead of 6, you’ve spent more overall, plus the hassle of scaffolding and labor all over again.

    Paint GradeApprox. Cost (per litre)Typical Lifespan
    Budget emulsion₹150-2502-3 years
    Mid-range weatherproof₹350-5004-6 years
    Premium elastomeric/heat-reflective₹600-900+6-8 years

    These numbers vary by brand and city, obviously, but the pattern holds pretty consistently across the market.


    FAQs About Exterior House Painting Tips

    Q: How often should exterior house paint be redone? Generally every 5-7 years with a good quality paint and proper prep, though coastal or high-humidity areas might need it closer to every 4-5 years.

    Q: What’s the best season to paint a house exterior in India? Post-monsoon through winter, roughly October to February, works best in most regions. Avoid peak monsoon and peak summer heat if you can help it.

    Q: Is primer really necessary for exterior walls? Yes, especially on bare plaster, repaired cracks, or if you’re switching from a dark color to a lighter one. It helps the topcoat bond properly and improves overall durability.

    Q: How many coats of paint does an exterior wall need? Typically one primer coat plus two topcoats. Older or heavily repaired walls sometimes need a third topcoat for even coverage.

    Q: Does the color of exterior paint affect how long it lasts? Yes, to some extent. Darker shades absorb more heat and tend to fade quicker under direct sun compared to lighter, more reflective colors.

    Q: Can I paint over old, peeling exterior paint without scraping it off? Not if you want it to last. Painting over loose or flaking paint just traps the problem underneath, and you’ll likely see cracking again within a year or so.

    Final Thoughts

    Getting exterior house painting tips right really comes down to patience with the prep work, choosing paint suited to your local climate, and timing the job for the right season. None of it is complicated, but all of it gets skipped when people are in a hurry to finish the job over a weekend.

    If your exterior is due for a repaint, don’t just call the first painter available — ask them specifically about surface prep and how many coats they’re planning. That one conversation before work starts will save you a lot of frustration two monsoons from now.

  • How to Choose Paint Colors for Small Rooms (Without Making Them Feel Boxed In)

    How to Choose Paint Colors for Small Rooms (Without Making Them Feel Boxed In)

    Ever walked into a room and felt like the walls were closing in on you? That’s usually not the furniture’s fault. It’s the paint. Picking the right paint colors for small rooms can genuinely change how a space feels — sometimes more than knocking down a wall would, and for about 2% of the cost.

    I’ve repainted three flats in the last six years, two of them tiny 1BHKs in Mumbai and Pune, and I learned this the hard way. My first apartment had a bedroom I painted a deep maroon because I liked how it looked on Pinterest. It looked like a cave within a week. Lesson learned. Let’s get into what actually works.

    Why Paint Color Matters More in Small Spaces

    Paint colors for small rooms aren’t just about aesthetics — they change how your brain perceives depth and distance. Light bounces differently off pale walls than dark ones, and in a cramped room, every bit of bounced light counts toward making the space feel open.

    In a large hall, a bold color is just one design element among many. In a 10×10 bedroom, it’s basically the entire room. There’s nowhere for your eye to rest except the color you chose, which is why the stakes feel so much higher when the square footage is small.

    Stick to Light, Cool Undertones First

    If you’re unsure where to start, cool-toned light colors are close to foolproof. Think soft blues, sage greens, warm whites, and dusty lavenders. These recede visually — meaning the wall seems to pull back from you instead of pressing forward.

    A few reliable ones I keep recommending to friends:

    • Soft sage green (calming, works well in bedrooms)
    • Warm off-white or eggshell (safe, flexible, resells well if you’re renting)
    • Pale dusty blue (great for rooms that get harsh afternoon sun)
    • Light greige — that grey-beige hybrid everyone’s using in 2026

    Avoid stark, cold white though. It can look clinical and actually make a small room feel emptier rather than bigger, which isn’t really the goal here.

    Don’t Be Scared of a Bold Accent Wall

    Direct answer: One accent wall in a small room, painted a shade or two darker than the rest, can add depth instead of shrinking the space — as long as the other three walls stay light and the accent wall isn’t the one facing the door.

    This is where I disagree with a lot of “small room” advice that tells you to keep everything pale. A single wall in a rich color — teal, terracotta, even a deep navy — can actually make a room feel more intentional and layered. It stops the space from looking like an empty box.

    Picture a small study room in a Jaipur apartment, maybe 8×9 feet. Paint three walls a warm white, and the wall behind the desk a deep terracotta. Suddenly the room has a focal point instead of just… existing. That’s the difference between a room that feels small and one that feels cozy.

    Use the Same Color on Walls and Ceiling

    Direct answer: Painting the ceiling the same color (or a slightly lighter tint) as the walls removes the visual “stop line” where wall meets ceiling, tricking the eye into reading the room as taller and more continuous.

    This one surprises people. We’re trained to think ceilings should always be white. But in a room with low ceilings — common in a lot of older Indian apartments — a stark white ceiling against colored walls creates a hard line that actually draws attention to how low the ceiling is.

    Try this instead: pick your wall color, then ask your painter for the same shade at 50% strength for the ceiling. It’s a small ask but the effect is noticeable.

    Mind the Natural Light in the Room

    North-facing rooms in India get cooler, flatter light most of the day. South and west-facing rooms get warmer, harsher light, especially in summer. This matters a lot more than people realize when picking paint.

    • North-facing room: lean warm (soft yellows, warm greiges) to counter the coolness
    • South/West-facing room: cooler tones (blues, sage) balance the heat and glare
    • East-facing room: fairly flexible, gets a nice soft morning light

    I’ve noticed clients skip this step constantly, then wonder why the “perfect” color from the paint store swatch looks completely different once it’s on their actual wall. Always test a sample patch and look at it morning, afternoon, and evening before committing.

    Use Vertical Stripes or Two-Tone Walls for Height

    If your small room has decent height but limited floor area, two-tone walls — a darker lower half and lighter upper half, split around chair-rail height — can stretch the room upward visually. It’s an old trick but it still works.

    Alternatively, thin vertical stripes (subtle, not circus-tent bold) draw the eye up and down rather than side to side, which makes low ceilings feel taller.

    [link to related guide about small space furniture layout here]

    Glossy vs Matte Finish Actually Matters Too

    People obsess over the color and completely ignore the finish, which is honestly a mistake. Glossier finishes — eggshell or satin — reflect more light and add a subtle sense of depth. Flat matte finishes absorb light and can make walls feel closer.

    For small rooms, I’d generally push toward eggshell or satin on walls, and reserve pure matte for ceilings or accent trim only.

    Test Before You Commit — Seriously

    Direct answer: Always paint a sample patch of at least 2×2 feet directly on your wall and observe it across a full day before finalizing — swatches and paint-store lighting are notoriously misleading for how a color will actually read in your room.

    This sounds obvious but almost nobody does it properly. I’ve seen people pick colors off a phone screen. Don’t do that. Screens lie, phone cameras lie, and paint store lighting is designed to make everything look flattering.

    [link to related guide about testing paint samples at home here]

    A Quick Real-World Comparison

    Here’s a rough breakdown of how different color choices performed across three small rooms I’ve personally repainted or consulted on:

    Room TypeColor UsedPerceived Effect
    9×10 bedroomDeep maroon (all walls)Felt smaller, cave-like
    10×10 bedroomSage green + white ceilingFelt noticeably airier
    8×9 studyWhite + terracotta accent wallFelt cozy, not cramped

    Small sample size, sure. But it lines up with pretty much every professional recommendation I’ve come across since.

    [link to related guide about budget home renovation ideas here]


    FAQs About Paint Colors for Small Rooms

    Q: What’s the single best color for a small room? There isn’t one universal “best” — but soft sage green, warm white, and light greige are the safest bets if you want a small room to feel bigger without playing it too safe.

    Q: Should small rooms always be painted white? No, not necessarily. White works, but it can feel cold or clinical. A soft, light color with warmth often performs just as well while feeling more like a lived-in home.

    Q: Do dark colors always make a room look smaller? Not always — a single dark accent wall can actually add depth. The mistake is painting all four walls a dark shade with no contrast anywhere.

    Q: Does ceiling color really make that much difference? Yes, more than most people expect. Matching or lightly tinting the ceiling to the wall color removes the visual break and makes the room read taller.

    Q: How many paint samples should I test before deciding? At least two or three, and always on the actual wall, not a cardboard swatch. Look at them at different times of day before you commit to buying full cans.

    Q: Is glossy or matte finish better for small rooms? Eggshell or satin generally works better than flat matte for walls in small rooms, since it reflects a bit more light. Save matte for ceilings or trim.

    Final Thoughts

    Choosing paint colors for small rooms really comes down to a handful of decisions: go light and cool where you’re unsure, don’t be afraid of one bold wall, match your ceiling to your walls, and actually test your color before you paint the whole room.

    None of this needs an interior designer or a huge budget — a couple of sample pots from any local hardware store will get you there. Grab two or three shades this weekend, paint a patch on your actual wall, and live with it for a day before deciding. Your small room will thank you for it.

  • Hardwood vs Laminate Flooring: Which One Should You Pick?

    Hardwood vs Laminate Flooring: Which One Should You Pick?

    So you’re renovating, and somewhere between the paint samples and the tile catalogue, you hit the big question: hardwood vs laminate flooring. It’s one of those decisions that feels small until you’re three years in and either loving your floor or quietly resenting it every time you mop.

    I’ve helped friends pick flooring for everything from a one-bedroom flat in Jaipur to a full villa renovation, and honestly, there’s no single “right” answer. It depends on your budget, your climate, and how much patience you have for maintenance. Let’s break it down properly.

    What’s the Real Difference Between Hardwood and Laminate?

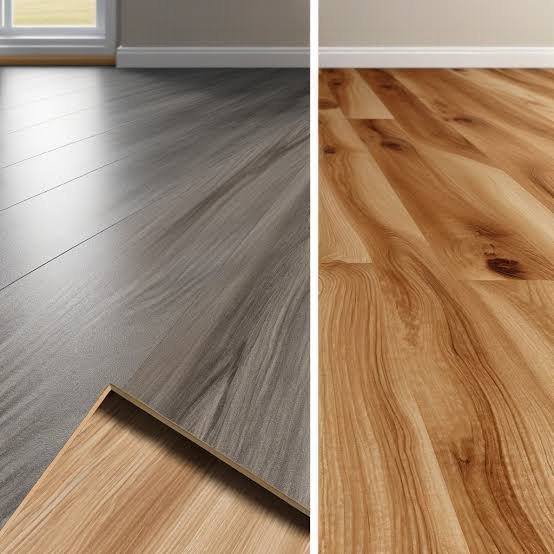
    Hardwood flooring is solid wood, cut and finished from actual trees — oak, teak, walnut, whatever suits your taste and budget. Laminate, on the other hand, is a synthetic product: a photographic layer of wood printed on a fiberboard core, sealed with a protective coating on top.

    That’s the core distinction, and it explains almost every difference you’ll read about below — price, feel, durability, resale value, all of it traces back to this one fact.

    How Do They Actually Feel Underfoot?

    Real wood has a certain warmth to it. You can feel the grain, the slight temperature difference, the way it creaks just a little with age (some people love this, some find it annoying). Laminate feels harder and cooler, more like walking on a very convincing photograph — because that’s essentially what it is.

    Cost Comparison: What Will You Actually Spend?

    In direct terms: laminate flooring in India typically runs ₹80–₹250 per sq ft, while solid hardwood flooring costs anywhere from ₹300 to ₹800+ per sq ft depending on the wood species. Installation charges add further to hardwood’s premium.

    I’ll be blunt here — if budget is your primary concern, laminate wins by a wide margin. A 1,000 sq ft flat could easily cost you ₹2-3 lakh more in hardwood versus laminate, once you factor in installation and finishing. That’s not pocket change for most homeowners.

    But cost isn’t the whole story. Cheap flooring that needs replacing in eight years isn’t actually cheap — it’s deferred expense.

    Durability: Which One Survives Daily Life Better?

    This is where opinions get heated, and I’ll admit mine is a bit unconventional. Everyone assumes hardwood is automatically tougher because it’s “real.” In practice, I’ve seen laminate hold up better in high-traffic homes with kids and pets, simply because its top layer resists scratches so well.

    Hardwood, though, has one massive advantage: you can sand and refinish it. Got deep scratches after ten years? Refinish it and it looks new again. Laminate doesn’t offer that option — once the top layer wears through, you’re looking at replacement, not repair.

    • Hardwood: scratches more easily but can be refinished multiple times over decades
    • Laminate: scratch-resistant surface but no repair option once damaged
    • Both: vulnerable to standing water, though laminate swells and warps faster

    Maintenance: How Much Work Are You Signing Up For?

    Picture a small business owner in Jaipur running a boutique with laminate flooring — she mops daily, wipes spills immediately, and five years in, it still looks presentable with zero fuss. That’s laminate’s biggest selling point. It just doesn’t demand much from you.

    Hardwood needs more attention. You’re looking at periodic polishing, careful humidity control (especially relevant in India’s varying climates — Mumbai’s monsoon humidity is brutal on wood), and avoiding harsh cleaning chemicals that strip the finish.

    Does Climate Actually Matter That Much?

    Yes, more than people expect. Solid wood expands and contracts with humidity swings. In coastal cities or during peak monsoon, untreated hardwood can warp or develop gaps. Laminate is far more dimensionally stable, which honestly makes it the safer bet in humid regions [link to related guide on flooring for humid climates here].

    Water and Moisture Resistance

    Neither hardwood nor laminate handles standing water well, but laminate’s fiberboard core actually swells faster and more permanently than solid wood once soaked. For kitchens and bathrooms, both need water-resistant variants or you should consider tile instead.

    If you’ve got a leaky pipe history in your building (we’ve all been there), this is worth thinking about seriously before committing to either option.

    Resale Value and Aesthetic Appeal

    Here’s something agents rarely say out loud: hardwood adds resale value in a way laminate simply doesn’t. Buyers perceive it as premium, permanent, a mark of a well-built home. Laminate, even the good stuff, gets mentally filed under “budget option” by most buyers touring a property.

    That said, high-end laminate has come a long way by 2026 — some embossed textures are genuinely hard to distinguish from real wood at a glance. [link to guide on best laminate brands in India here] Does it fool everyone? No. Does it fool most casual visitors? Pretty much, yes.

    Installation Time and Complexity

    Laminate installs faster — usually a floating click-lock system that a decent contractor finishes in 2-3 days for an average flat. Hardwood installation, especially solid strip flooring nailed or glued down, can take a week or more and typically costs more in labour too.

    Environmental Considerations

    Hardwood, sourced responsibly, is a renewable material and often biodegradable at end of life. Laminate involves more synthetic components and is harder to recycle. If sustainability matters to you, this tips the scale toward wood — assuming it’s sustainably harvested, which is worth verifying with your supplier [link to sustainable sourcing guide here].

    Alt text suggestions:

    1. “Close-up comparison of solid oak hardwood flooring texture versus laminate wood-look flooring”
    2. “Living room interior with hardwood flooring installed in a modern Indian home”
    3. “Contractor installing click-lock laminate flooring panels in an apartment”

    FAQs: Hardwood vs Laminate Flooring

    Is laminate flooring waterproof? Not fully. Most laminate is water-resistant, not waterproof — it can handle spills wiped up quickly but will swell if water sits on it for hours. Look for specifically labeled “waterproof laminate” if that’s a concern.

    Which lasts longer, hardwood or laminate? Hardwood generally lasts longer overall — 25-100 years with proper care and refinishing — while laminate typically lasts 15-25 years before needing replacement.

    Can I install hardwood or laminate over existing tiles? Laminate, yes, usually with an underlayment. Hardwood installation over tile is trickier and often needs a plywood subfloor first, adding cost.

    Does laminate flooring increase home value like hardwood does? Not as much. Hardwood is generally seen as a value-adding upgrade by buyers and appraisers, while laminate is viewed more neutrally, sometimes as a cost-saving choice.

    Is hardwood flooring worth it for a rental property? Usually not — the maintenance and upfront cost don’t make sense if you’re not living there long-term. Laminate is the more practical, budget-friendly choice for rentals.

    What’s better for homes with pets? Laminate tends to handle pet claws better due to its scratch-resistant coating, though accidents (urine, water) can still cause swelling if not cleaned up quickly.

    Conclusion

    At the end of the day, hardwood vs laminate flooring really comes down to your priorities. Want long-term value, a premium feel, and don’t mind the upkeep? Go hardwood. Working with a tighter budget, want low-maintenance floors, and value practicality over prestige? Laminate is the smarter pick for most Indian homes in 2026.

    Still on the fence? Walk into a couple of flooring showrooms near you, ask for sample boards of both, and live with them in your actual room lighting for a day or two before deciding — it makes a real difference once you see it at home rather than under showroom lights.

  • Best Flooring for Pets: What Actually Survives Dogs & Cats

    Best Flooring for Pets: What Actually Survives Dogs & Cats

    If you’ve ever come home to find claw marks across your new laminate or a mystery puddle soaking into your carpet, you already know why finding the best flooring for pets matters so much. It’s not just about looks anymore — it’s about survival. Between shedding, scratching, accidents, and the occasional zoomies session at 11 PM, your floor takes a beating most manufacturers never planned for.

    I’ve helped a few friends pick flooring after they brought home a puppy or a rescue cat, and honestly, the “perfect” flooring on paper rarely matches what works in real life. This guide covers what genuinely holds up — not just what looks good in a showroom.

    Why Regular Flooring Fails in Pet Homes

    Best flooring for pets isn’t just a marketing phrase — it’s a real category with real requirements. Regular flooring is built for foot traffic, not claws, accidents, and constant moisture.

    Dog nails act like tiny chisels on soft surfaces. Cat urine, if it seeps into grout or wood seams, can be almost impossible to fully remove. And shedding fur? It finds every crack and rough texture there is.

    A few common failure points:

    • Soft woods scratch within months of getting a puppy
    • Grout lines trap odor and bacteria over time
    • Glossy tiles turn into ice rinks for older dogs with joint issues
    • Carpet fibers hold onto pet dander long after cleaning

    Vinyl Flooring: Often the Smartest Choice

    Best flooring for pets discussions almost always circle back to vinyl, and there’s a good reason for that. Luxury vinyl plank (LVP) is waterproof, scratch-resistant, and forgiving on paws and joints alike.

    Quick answer: Vinyl plank flooring is widely considered the best flooring for pets because it’s 100% waterproof, resists scratches, and costs far less than hardwood — typically ₹120–₹350 per sq. ft. in India as of 2026.

    I’ll admit I was skeptical about vinyl a few years back — it used to look cheap and plasticky. That’s changed a lot. Modern LVP mimics wood grain convincingly, and some brands even offer textured, matte finishes that hide scratches better than polished tile does.

    Things I’d tell anyone shopping for vinyl:

    • Go for at least 20 mil wear layer if you have large dogs
    • Click-lock installation is easier to repair in sections if damaged
    • Matte finishes hide scratches far better than glossy ones

    Tile Flooring: Durable, But Not Without Trade-offs

    Tile is tough, no doubt. Ceramic and porcelain resist scratches almost entirely, and cleaning up accidents is quick — just wipe and go.

    But here’s my honest take: tile isn’t always pet-friendly in practice. It’s cold, hard, and slippery, especially glazed tile. For older dogs with hip issues or arthritis, this can genuinely make daily life harder. I’ve seen a Labrador struggle just walking across a polished marble hallway.

    If you do go with tile:

    • Choose matte or textured porcelain over glossy finishes
    • Use rugs with rubber backing in high-traffic zones
    • Seal grout lines every 12–18 months to prevent odor buildup

    Laminate Flooring: Budget-Friendly But Risky

    Laminate looks like wood without the wood price tag, which makes it tempting. The problem is the top layer — while scratch-resistant to an extent, it’s not waterproof at the seams.

    Picture this: a small business owner in Jaipur installs laminate in his home office, where his golden retriever naps most afternoons. Six months in, water from a spilled bowl seeps into a seam near the door, and the boards start swelling. That’s a fairly common story, honestly.

    If budget is the deciding factor, look for laminate rated AC4 or higher with a tight click-lock seam system, and keep water bowls on trays.

    Hardwood Flooring: Beautiful, But High Maintenance

    Hardwood has undeniable charm — nothing quite matches that warm, natural look. But is it the best flooring for pets? Not really, unless you’re extremely careful.

    Softer woods like pine dent easily. Even harder woods like oak can show scratches over a few years with an active dog. If hardwood is non-negotiable for you:

    • Choose a hardness rating of at least 1,290 on the Janka scale (oak, hickory, maple)
    • Apply a matte or satin polyurethane finish, which hides scuffs better than glossy
    • Trim your dog’s nails every 3–4 weeks — this alone reduces scratching significantly

    Engineered Wood: A Middle Ground Worth Considering

    Engineered wood gives you a real wood veneer over a stable plywood core, which makes it less prone to warping from humidity or the odd accident compared to solid hardwood.

    Quick answer: Engineered wood flooring works well for pet owners who want a wood look with better moisture resistance than solid hardwood, though it still needs prompt cleanup of spills and accidents.

    It won’t survive standing water the way vinyl does, but for households with one calm, older dog rather than a hyperactive puppy, it’s a reasonable compromise. [link to related guide on engineered wood vs solid hardwood here]

    Cork and Rubber Flooring: Underrated Options

    Cork doesn’t get talked about enough in pet flooring guides. It’s naturally antimicrobial, soft underfoot, and has a bit of give that’s genuinely kinder on aging joints — both yours and your dog’s.

    Rubber flooring, more common in gyms, is gaining traction in Indian homes with large dog breeds. It’s nearly indestructible and easy to hose down, though the aesthetic isn’t for everyone — it can look a little industrial in a living room.

    • Cork: warm, quiet, decent scratch resistance, but needs periodic resealing
    • Rubber: extremely durable, water-resistant, but limited design options

    Carpet: Generally Best Avoided

    I’ll be blunt — carpet and pets rarely mix well long-term. It traps odor, stains permanently in some cases, and holds onto allergens and shedding fur no matter how often you vacuum. [link to related guide on pet-friendly home cleaning tips here]

    If you love the softness of carpet, consider limiting it to low-traffic rooms your pets don’t frequent much, like a guest bedroom.

    Choosing Based on Your Pet’s Size and Habits

    Not every pet needs the same flooring. A senior cat that mostly naps causes very different wear than a young Labrador that sprints indoors.

    Some quick guidance:

    1. Small, calm pets (older cats, small breed dogs) — laminate or engineered wood can work fine
    2. Active, medium-large dogs — vinyl plank or rubber flooring holds up best
    3. Multiple pets or frequent accidents — waterproof vinyl is nearly always the safer bet
    4. Senior pets with joint issues — avoid glossy tile; go matte vinyl or cork instead

    [link to related guide on pet-proofing your home here]

    FAQ: Common Questions About Pet-Friendly Flooring

    Is vinyl flooring really safe for pets? Yes, most vinyl flooring today is non-toxic and safe once fully cured after installation. Just air out the room for a day or two after fitting, since it can have a mild odor initially.

    What flooring is best for dog urine smell? Waterproof vinyl plank handles this best since urine sits on the surface instead of soaking in. Tile is a close second, provided the grout is sealed properly.

    Does hardwood flooring scratch easily with dogs? It depends on the wood species and your dog’s nail length. Softer woods scratch fast; harder woods like oak or hickory hold up better, especially with regular nail trims.

    Is laminate flooring good for homes with pets? It’s an okay budget option but not ideal if your pet has frequent accidents, since water can seep into the seams and cause swelling.

    What’s the most affordable pet-friendly flooring in India? Vinyl plank generally offers the best balance of cost and durability, often ranging from ₹120 to ₹350 per square foot depending on quality and brand.

    Can I install pet-friendly flooring myself? Click-lock vinyl and laminate are fairly DIY-friendly. Tile and hardwood usually need a professional installer for a lasting finish.

    Final Thoughts

    Choosing the best flooring for pets really comes down to knowing your specific animal — its size, energy level, and habits — rather than chasing the flashiest showroom option. Vinyl plank tends to win for most households thanks to its water resistance and scratch tolerance, but cork, rubber, and engineered wood all have their place depending on your budget and style.

    Before you commit to a full home renovation, it might be worth ordering a few samples and literally letting your dog or cat walk over them for a week. You’ll learn more from that than any spec sheet. What’s worked for your home so far?